
NivOmatic help and instructions
Installing, adjusting and looking after your NivOmatic: it’s all here, with diagrams, photos and video. Question not answered? Use the form at the bottom of the page to get in touch quickly.
Installation video · Removable NivOmatic · NivOmatic Pro case · Setting the right level · Fixed installations · Not working? · OFF function and leak test · Maintenance and winter · PDF instructions · Contact us
Installation video
Removable NivOmatic: installation in 3 steps

1. Screw the unit on by hand, without forcing it (4 turns). Never use a tool: overtightening can dislodge the valve, and a cross-threaded start can damage the thread. Never force it: the valve is deliberately mounted with some give, for functional reasons.
 CLICK!
2. Clip the bracket on: press very firmly until it clicks.

3. Fit the filter washer and connect the hose (quick connector supplied).

Place the bracket on the coping, then turn on the water. If you wish, the stainless steel pin supplied lets you secure the bracket to the coping (Ø 5 mm hole): this is optional.
Water supply: clean water, pressure 0.5 to 8 bar. Well or borehole water: don’t forget the filter washer (for water carrying more sediment, a garden filter can help). For an installation that stays in place, the NivOmatic supply kit (12 m of reinforced, UV-resistant hose with screw fittings) adds reliability and safety.
NivOmatic Pro case: fill a pool without supervision
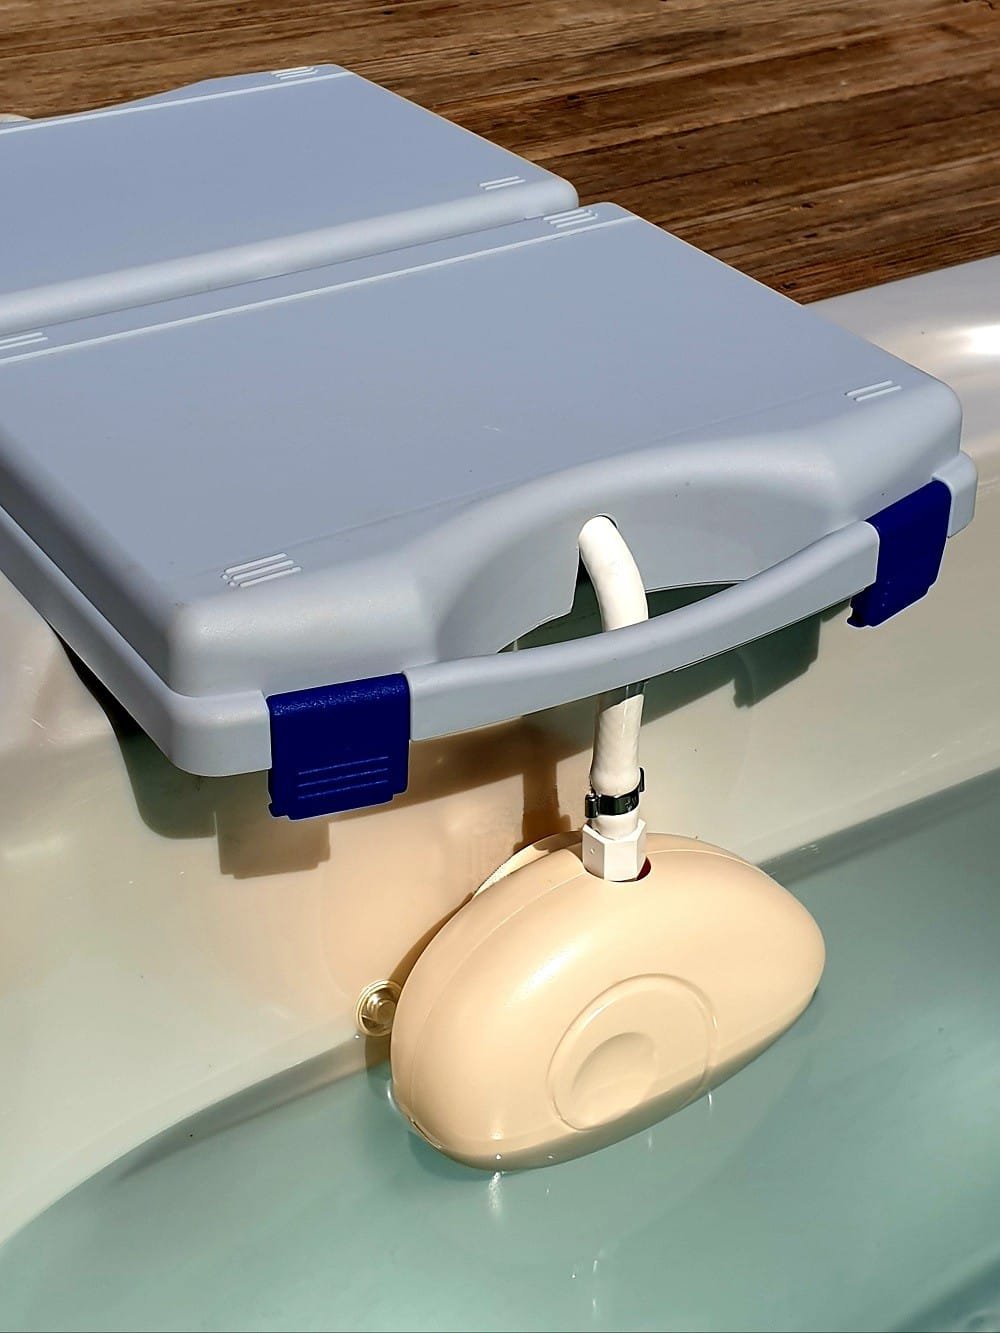
- Clip the hose into the 3 notches of the open case: 2 at the hinge, 1 in the middle of the handle. The hose runs underneath the case.
- Place the open case on the coping or pool deck, handle towards the pool: its weight holds the unit in place. Clip the hose so that the unit sits at the height you want.
- Fit the filter washer in the female connector, then connect (3/4″ male connector or male quick connector supplied).
NivOmatic Pro fills the pool to the set level, then shuts off the water automatically. Once filling is complete, turn off the water supply, drain the unit and the hose, and pack everything away in the case.


Setting the right level
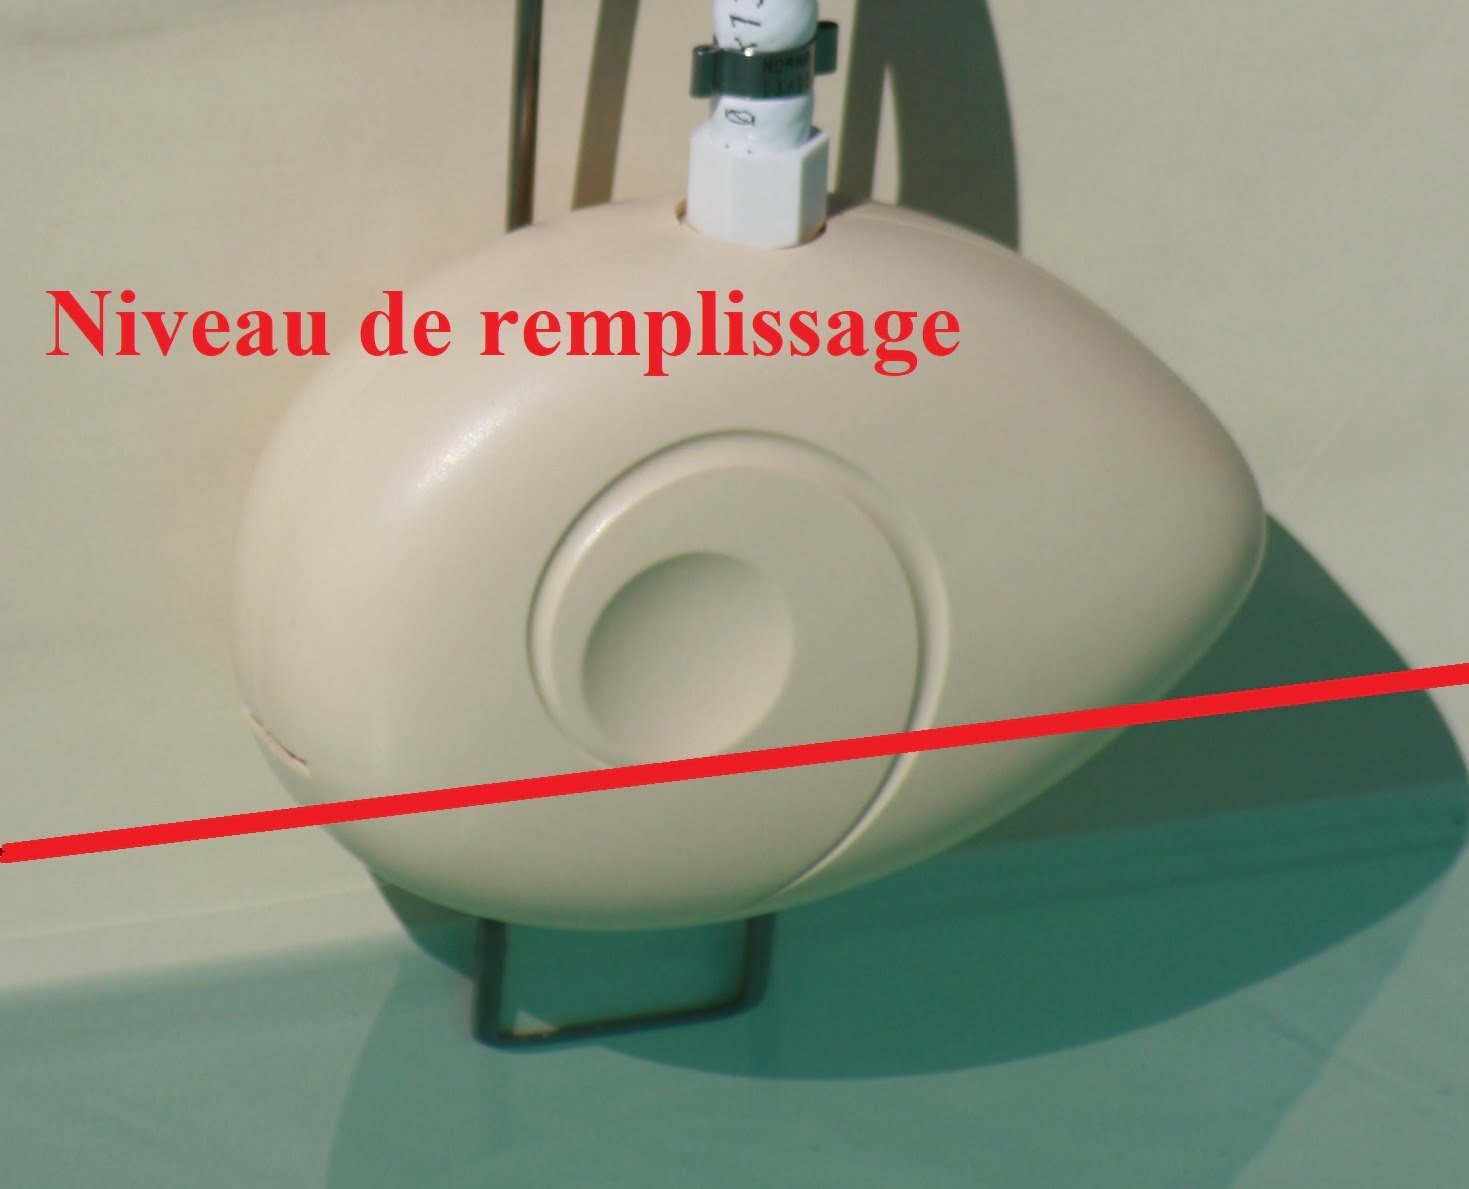
Recommended level: two-thirds of the way up the skimmer opening. Many pool owners don’t know this: too low, and the skimmer draws in air; too high, and it no longer skims the surface.
NivOmatic stops filling when the water reaches the level line shown in the picture. With the angle bracket, the level can be set from 5 to 26 cm below the top of the coping.
It is normal for NivOmatic to open and close several times before reaching its final level. Check that the water stops and that the connections do not leak when you first turn on the water, and again each time you put it back in place.
Fixed installations
With the fixed installation kit, NivOmatic can be fitted in the skimmer, in a through-wall fitting, in a filtration block or in a balance tank. The brackets can be cut and modified without voiding the warranty, so they adapt to any site layout. NivOmatic can also hang from its hose (overflow pool, balance tank).


Tip: NivOmatic does not protect against overflowing in heavy rain; that is the job of the pool’s overflow.
Water won’t stop, or won’t flow?
All our valves are tested in our workshop. The most common cause of a fault: the valve has been knocked out of its seat during fitting, by overtightening, a knock or too much strain on the hose.
- Turn off the water supply.
- Open the unit by pressing it at the top and bottom.
- Put the valve back in its seat, then close the unit.
- Refit the device, screwing it by hand, without forcing it (4 turns), then check again that the water stops.
Still not working? Write to us in English using the form below: in most cases, the problem is quickly solved.
OFF function and leak test
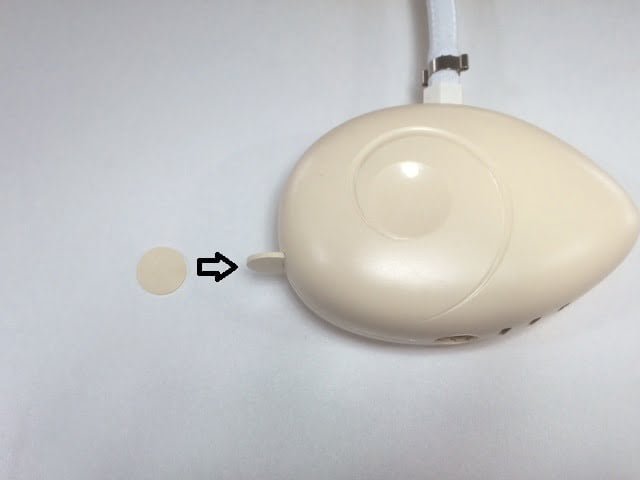
Is your pool losing water? First stop the automatic top-up: turn off the water supply, or push the OFF token (or a coin) three-quarters of the way into the slot on the unit.
Bucket test: place a full bucket near the pool and mark its water level and the pool’s. After 24 to 48 hours, if both levels have dropped by the same amount, there is no leak; if the pool has dropped more, consult your pool professional. A slight drop is normal (sun, wind, swimming).
Find out more: why your pool is losing water.
Maintenance and winter
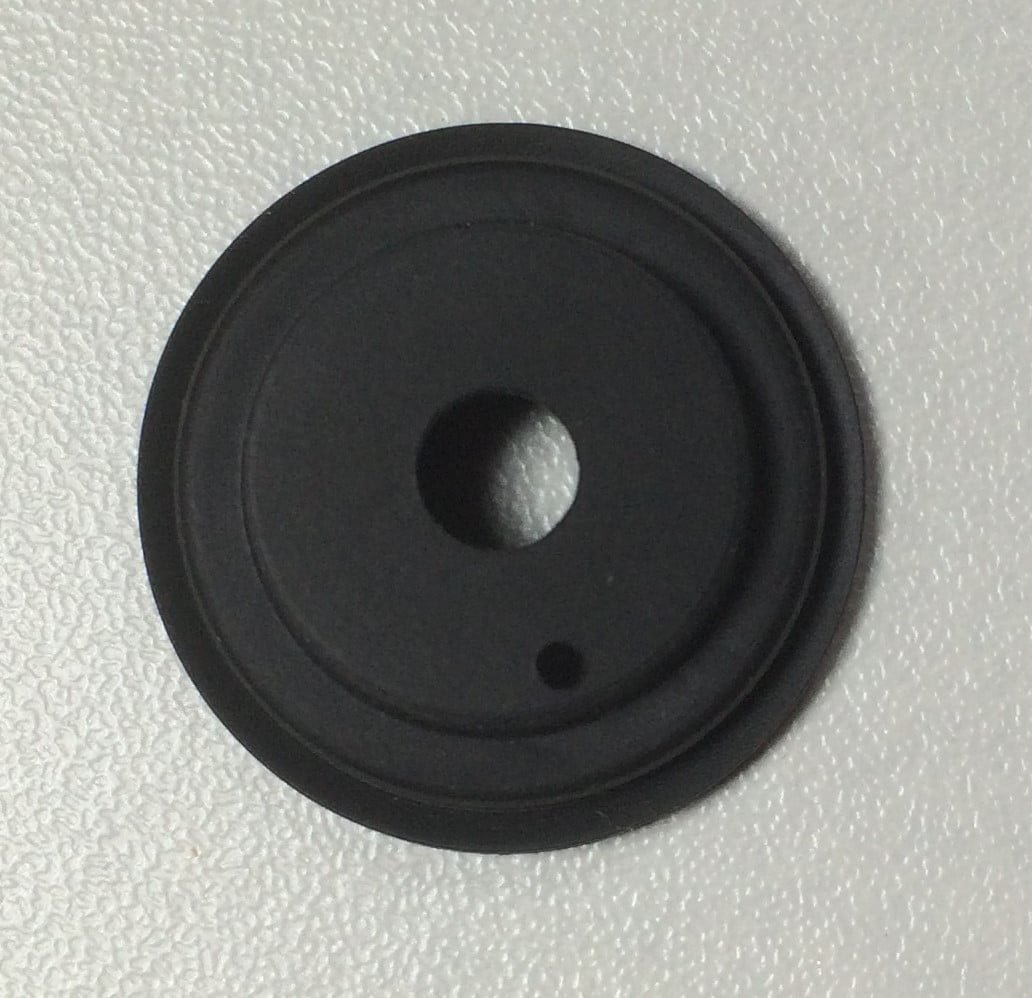
UV-resistant ABS housing, 316L stainless steel brackets, NF-standard valve tested for 200,000 cycles. The only wearing part is the EPDM membrane, to be replaced every 3 to 5 years depending on use. It takes just a few minutes: the replacement membrane comes with a fitting video.
Frost: drain the unit and the hose. Out of season, store them under cover.
Convinced? Find all our regulators, accessories and spare parts in our shop.
Downloadable instructions
Contact us
Describe your installation and the problem: we will reply from our workshop in the Dordogne.